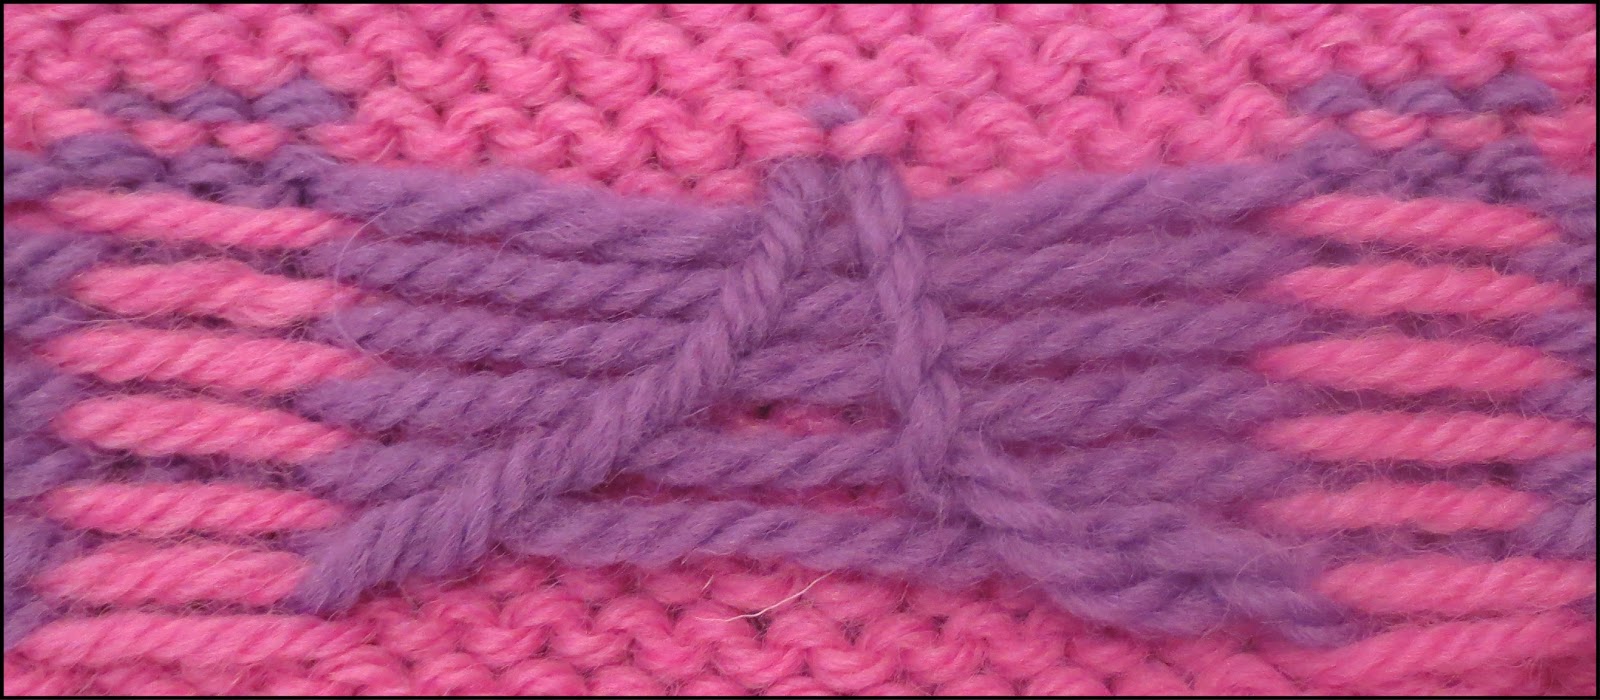
- Yarn in plastic bags
- Yarn unspoolers (also called yarn lazy susans)--with instructions to make a really neat one out of scraps
- Yarn bowls
- Collapsible wire and mesh baskets / binder clip yarn guides
- Command Hooks
Yarn in plastic bags
Placing the yarns in a plastic bag with the corners cut off works is so clever--I got the idea from Raveler KnitziMitzi back in 2010, thank you KM (and thanks for permission to re-post your idea!) |
| Yarn in plastic bags... |
Pro:
- Keeps each ball of yarn neat and organized
- yarn can stay in bag until next project--keep moths out by folding the cut corner over and using a paperclip or tape to seal the hole shut.
- Easy to see in use and in storage
- Inexpensive, brilliant idea
- Only works with center feed balls--too hard to unwrap from the outside when encased in a plastic bag
- The yarns are free to tangle once they leave the bags
- (however, the bags are slippery and easy to re-arrange, so untangling is not that big a deal)
- The bags very lightweight and pulling yarn out is sometimes an annoyingly two-handed procedure.
Yarn unspoolers (also called yarn lazy susans)
If your yarn tends to bias, then it is really best to unspool the yarn from the outside of the ball. There are various yarn unspoolers (sometimes called yarn lazy susans) for sale, or you can make one of scraps from this brilliant design shared here with kind permission of Linda S., Eugene, OR.After Linda gave me one of these years ago in a knitting class I taught, I use it all the time. It works splendidly. If you are handy, you probably have most of the ingredients around the house already.
 |
| Linda S's lazy susan finished product |
Ingredients and tools:
- variety of drill bits
- About 6" heavy-duty bendable copper wire
- pliers
- wooden spoon handle (or scrap of 1/2" dowel)
- strip of scrap wood
- the original is mounted on a scrap of 3/4 inch plywood 11" long x 1.25 inches wide
- safety cap--the kind you slip over cut wire-shelf ends
- dowel 5/16" (or whatever size will fit inside your CD spindle)
- small screw
- CD spindle--used for CD storage--look for one with a hollow spindle.
- optional: bar of soap, sandpaper, glue (if required)
- optional: 5" length of conduit or plastic pipe to lengthen the CD spindle (if required)
- optional: spring clamp vise for mounting lazy susan to work table
Procedure:
 |
| detail of yarn feeder |
- To make the yarn feeder, curl end of wire two times around the handle of a wooden spoon or a fat pen--leave a short length sticking out to the side, as shown
- Using the pliers, double back the very end of the wire.
- Over the doubled-back end of the wire, place the safety-cap--spread the wire apart until the safety cap achieves a good pressure-fit when slid on
- Prepare base for yarn feed by drilling a small hole for the wire, centered at one end of the wood strip, about 1/2" in from end.
- Insert the straight end of wire into the hole, it should pressure fit tightly. If it is somehow too loose, I recommend gorilla glue--follow the package directions, that stuff is amazing.
- Prepare base for yarn spinner by inserting the 5/16" dowel into the hollow spindle of the CD holder and make a mark about 1/8" below where the dowel protrudes from the spindle. Add another mark below this equal in depth to the depth of the scrap wood base. Cut the dowel at second mark.
- Example: depth of spindle is 3"=
- add 1/8"=3 1/8"=first mark
- add depth of base (3/4 inch) = 3 7/8"= second mark--cut at second mark
- Drill a 5/16th hole centered on the opposite end of the scrap wood from the copper wire, the hole should be about 1/2 inch in from the end. The only tricky thing about this whole deal is drilling this particular hole as straight as you can!
- Pressure fit the dowel into the hole. If it doesn't want to go, sand it down slightly, then rub it with a bar of soap. If it's somehow loose, consider gluing it in place.
- test fit the CD spindle onto the dowel, it should just about hit the scrap wood.
- Drill a small guide hole, then screw the small screw into the top of the dowel. The screw should protrude about 1/4" or 3/8 " out the top of the dowel.
- Test fit the CD spindle again, it should now spin freely on the screw head. If it squeaks, rub a bar of soap on the screw head; if it hits the base, raise the screw; if it is too high and wobbly, lower the screw, or substitute a shorter screw.
- Optional: insert a length of conduit or plastic plumbing pipe over the outside of the spindle if your particular CD spindle is too short to fully pierce through a ball of yarn with part of the spindle protruding. Sand the ends so they won't catch on your yarn.
- Attach your new yarn lazy susan to your work table with the spring clamp, or fasten it permanently in place if you prefer.
 |
| Illustration not to scale--the scrap wood is much longer in real life |
If you love this design, credit Linda. If the instructions are messed up, that's on me, so let me know if something's hard to follow here, OK?
Pro:
- Yarn unspoolers let the yarn wind off the outside of the ball. This is important for yarns which would knit a biased fabric if center-pulled
- Yarn unspoolers make knitting a pleasure--the yarn is firmly clamped in place and doesn't go skittering around, yet unspools easily for knitting.
- The yarns are unlikely to tangle
- Lazy susans take up more room than many other methods, plus, you cannot store your project in them, like you can with various other knitting organization schemes, so that's even MORE room taken up.
- Not travel friendly
- Might be expensive to buy
- (but you can make a great one out of scraps, per above)
- Worst of all: the cats LOOOOOVE them!
Yarn bowls
Creative potters and woodworkers offer "yarn bowls" for sale. Each individual's design has different features--check before you buy.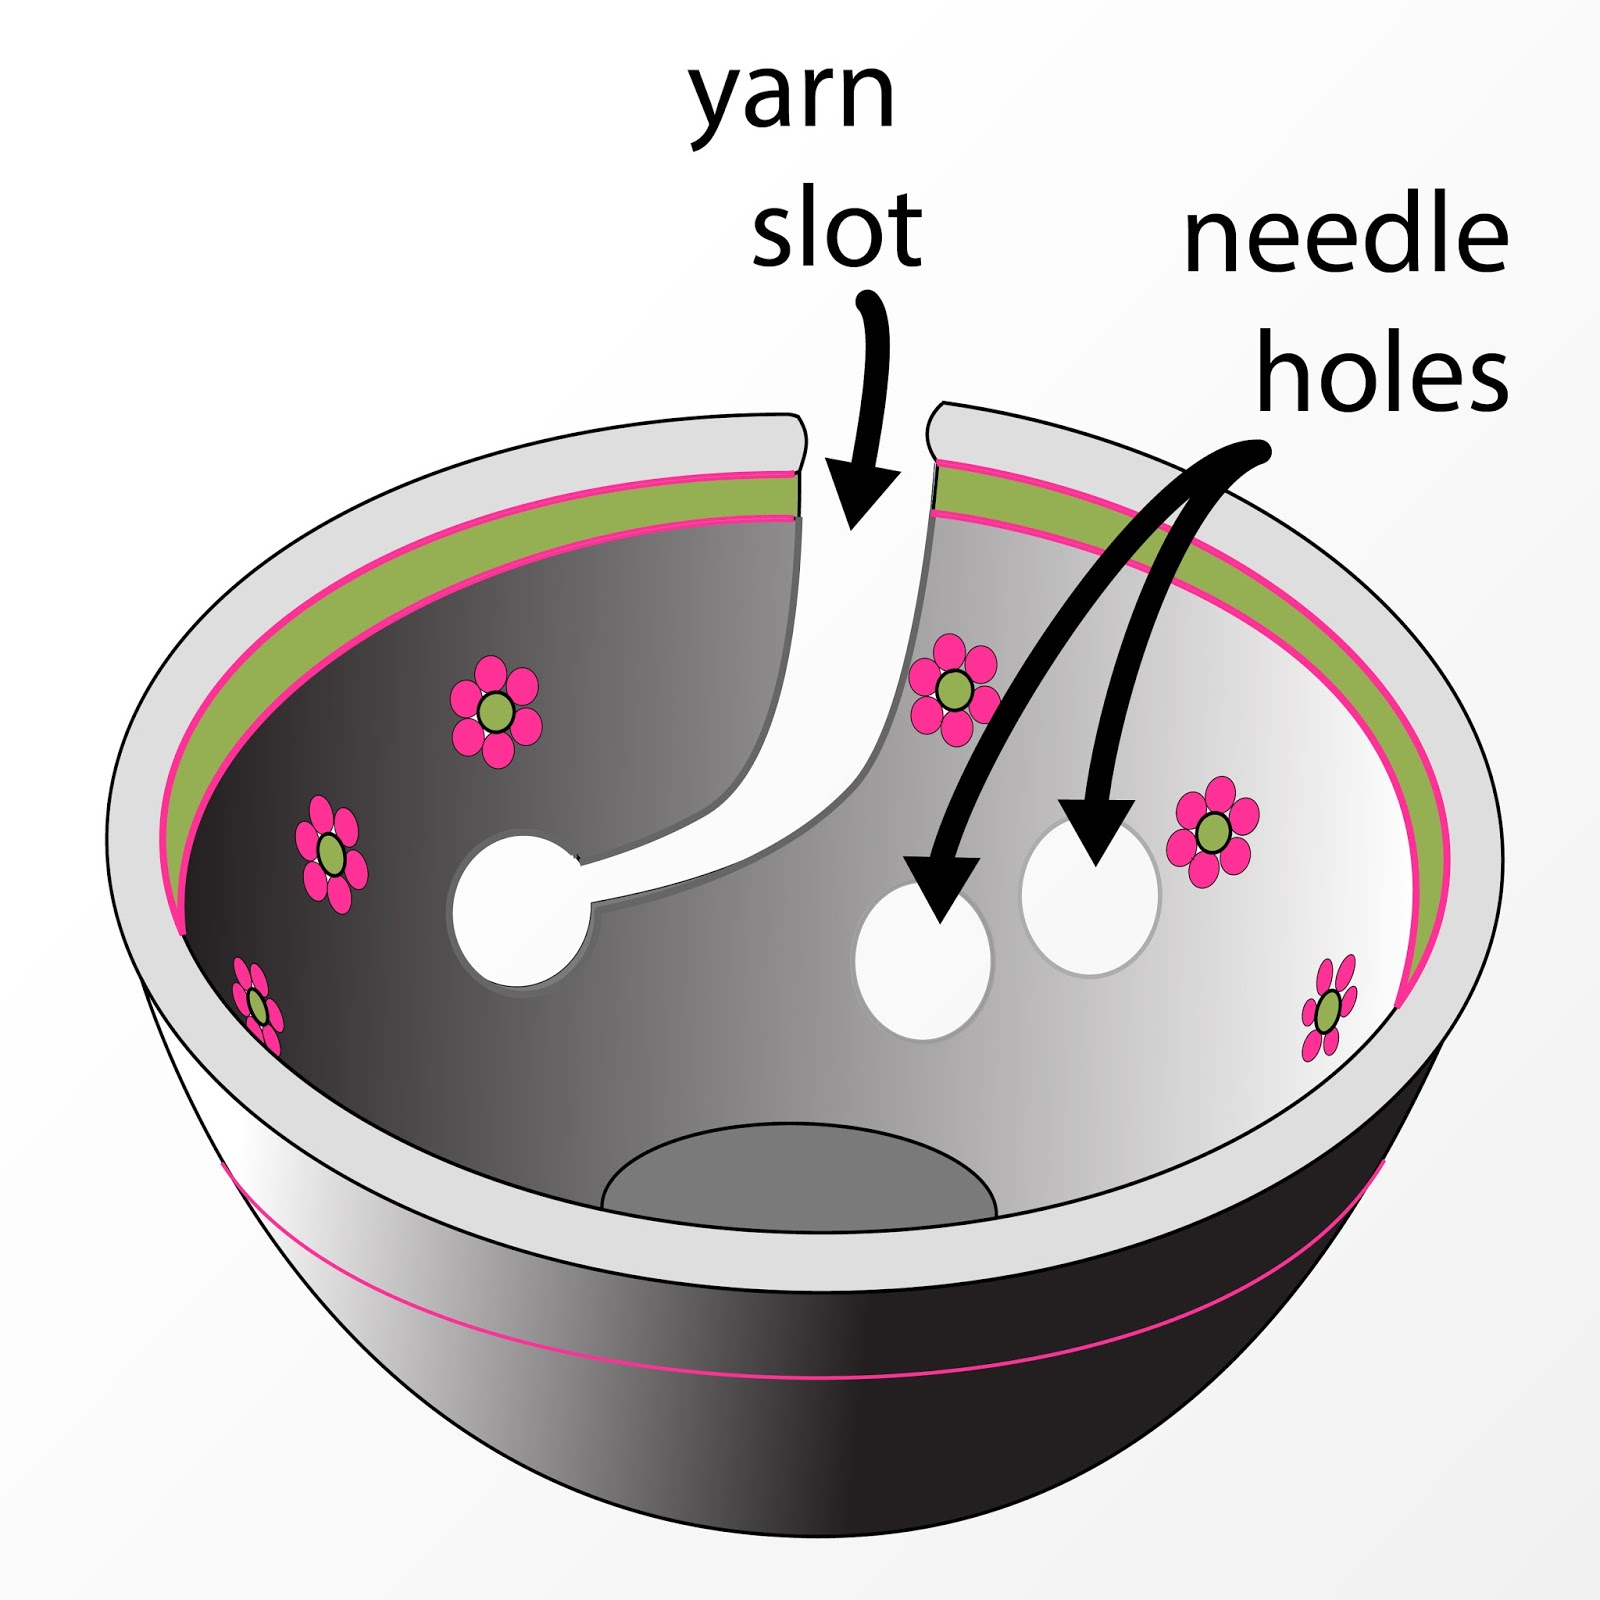 |
| A typical ceramic yarn bowl |
One desirable feature would be a yarn slot for the running yarn to feed through, rather than a hole. A hole seems like an OK idea, but when you want to put the yarn aside for a while--such as during a carry over on a stripe--you realize you cannot get the yarn out of the bowl without cutting it. A slot makes switching yarn around much easier.
Pro:
- A ceramic bowl is heavy and stays put, some wooden bowls are heavy, also.
- The yarn stays clean and protected inside the bowl, and there is often space to fit the project in the bowl, too, when you aren't working on it (that's what the needle holes are for--so you can leave the needles--either circ or straight--poked into the work and still fit the work into the bowl)
- If you place one ball of yarn per bowl, the yarn is free to jump around in the bowl. This allows an outside feed off the ball, so the yarn comes off with no biasing.
- (Sometimes, in a larger bowl, two balls fit loosely enough to jump around without tangling, especially if there are two yarn slots)
- A lighter-weight bowl, such as plastic or tupperware tends to skitter around
- (however, you can stabilize a lightweight bowl by placing a heavy weight in the bottom--rolls of pennies work well)
- A heavier weight bowl tends to be fragile, especially in ceramic
- Good quality yarn bowls are usually expensive
- Yarn bowls are bulky, and if you need one per color, they start to take up serious space
- Yarn bowls are not travel friendly
Collapsible wire-and-mesh basket / binder clip yarn guides
 |
| IKEA Noje |
NOJE baskets don't have a yarn guide like a yarn bowl or a lazy susan, but you can easily rig up yarn guides out of binder clips. Binder clip handles come off and go back on again if you'll simply flip the handles up, then squeeze the two sides of any one handle together towards one another. Because the yarn goes through these removeable handles, the yarn can be taken in and out of the guides without cutting. When it's time to put the project-basket into the suitcase, you flip the binder clip handles down, out of the way. When its time to knit, flip the handles back up again.
Naturally, it will occur to you that binder clips aren't restricted to use on-pop up baskets: you can attach them to an ordinary ceramic bowl, any kind of basket, etc., thus adding yarn guides where ever you like.
 |
| Noje pop up baskets + binder clips-- the magnifying glass to left offers a close up of binder clips in action |
You can put the cable of your circular knitting needle under the binder clip also. However, the baskets don't work very well with straight needles.
Pro:
- Pop-up baskets are to pack, easy to use, and keep projects separated: perfect for traveling with (or storing!!) multiple projects in a suitcase.
- Baskets accommodate surprisingly large projects as well as surprising amounts of yarn, yet pack down into a surprisingly small space
- Binder clip yarn guides work great with pop-up baskets, but they will attach to many other surfaces also, thus adapting all sort of containers to be knitting baskets/bowls.
Con:
- Pop-up baskets are light weight, skitter around in use
- (however, you can put a weight in these when you get to your destination)
- IKEA no longer sells these
- (maybe you can find a different manufacturer?)
- (By the way--if anyone *really wants to try these* I have enough, still in the package, to sell if you really want 'em. Contacting me is easiest through Ravelry)
- Baskets do not accomodate straight needles very well--the points want to poke right through the cloth.
Command hooks
Lastly, a method that works well wherever you are, whether in your favorite knitting nook at home or on vacation in a hotel room. With this trick you harness the amazing power of command brand hooks to hang your balls of yarn in any order you like, on pretty much any surface you like.Command hooks feature a removeable two-sided sticky backing. One side sticks to the hook, the other side sticks to the wall, the instructions come in the package. The backing comes off very easily by s-t-r-e-t-c-h-i-n-g the backing downwards ... BUT!!! pull SLOWLY or it will tear. When properly removed, a command hook leaves no mark on any surface, whether wall, table edge/bottom, or even an airplane or tour bus seat back.
When command hooks first came out, they cost the earth, but the price has come down substantially. Also, you can use the same hooks over and over again. The replaceable part are the sticky strips, but nowadays you can get boxes of 20 replacement sticky strips for under $3.00 if you hunt around on the web. (Prices vary WILDLY for this product, so keep hunting!)
In my experience, the best ones are the small size with the wire hook illustrated below. This style also works stuck under a table because the wire hook dangles freely from the plastic backer.
In my knitting nook at home, I have two stuck UNDER my work table and three stuck to the edge of my work table, so I can hang up to 5 different balls of yarn right next to one another, exactly where I am working. Even with the most complex patterns, I've never used all the hooks at the same time.
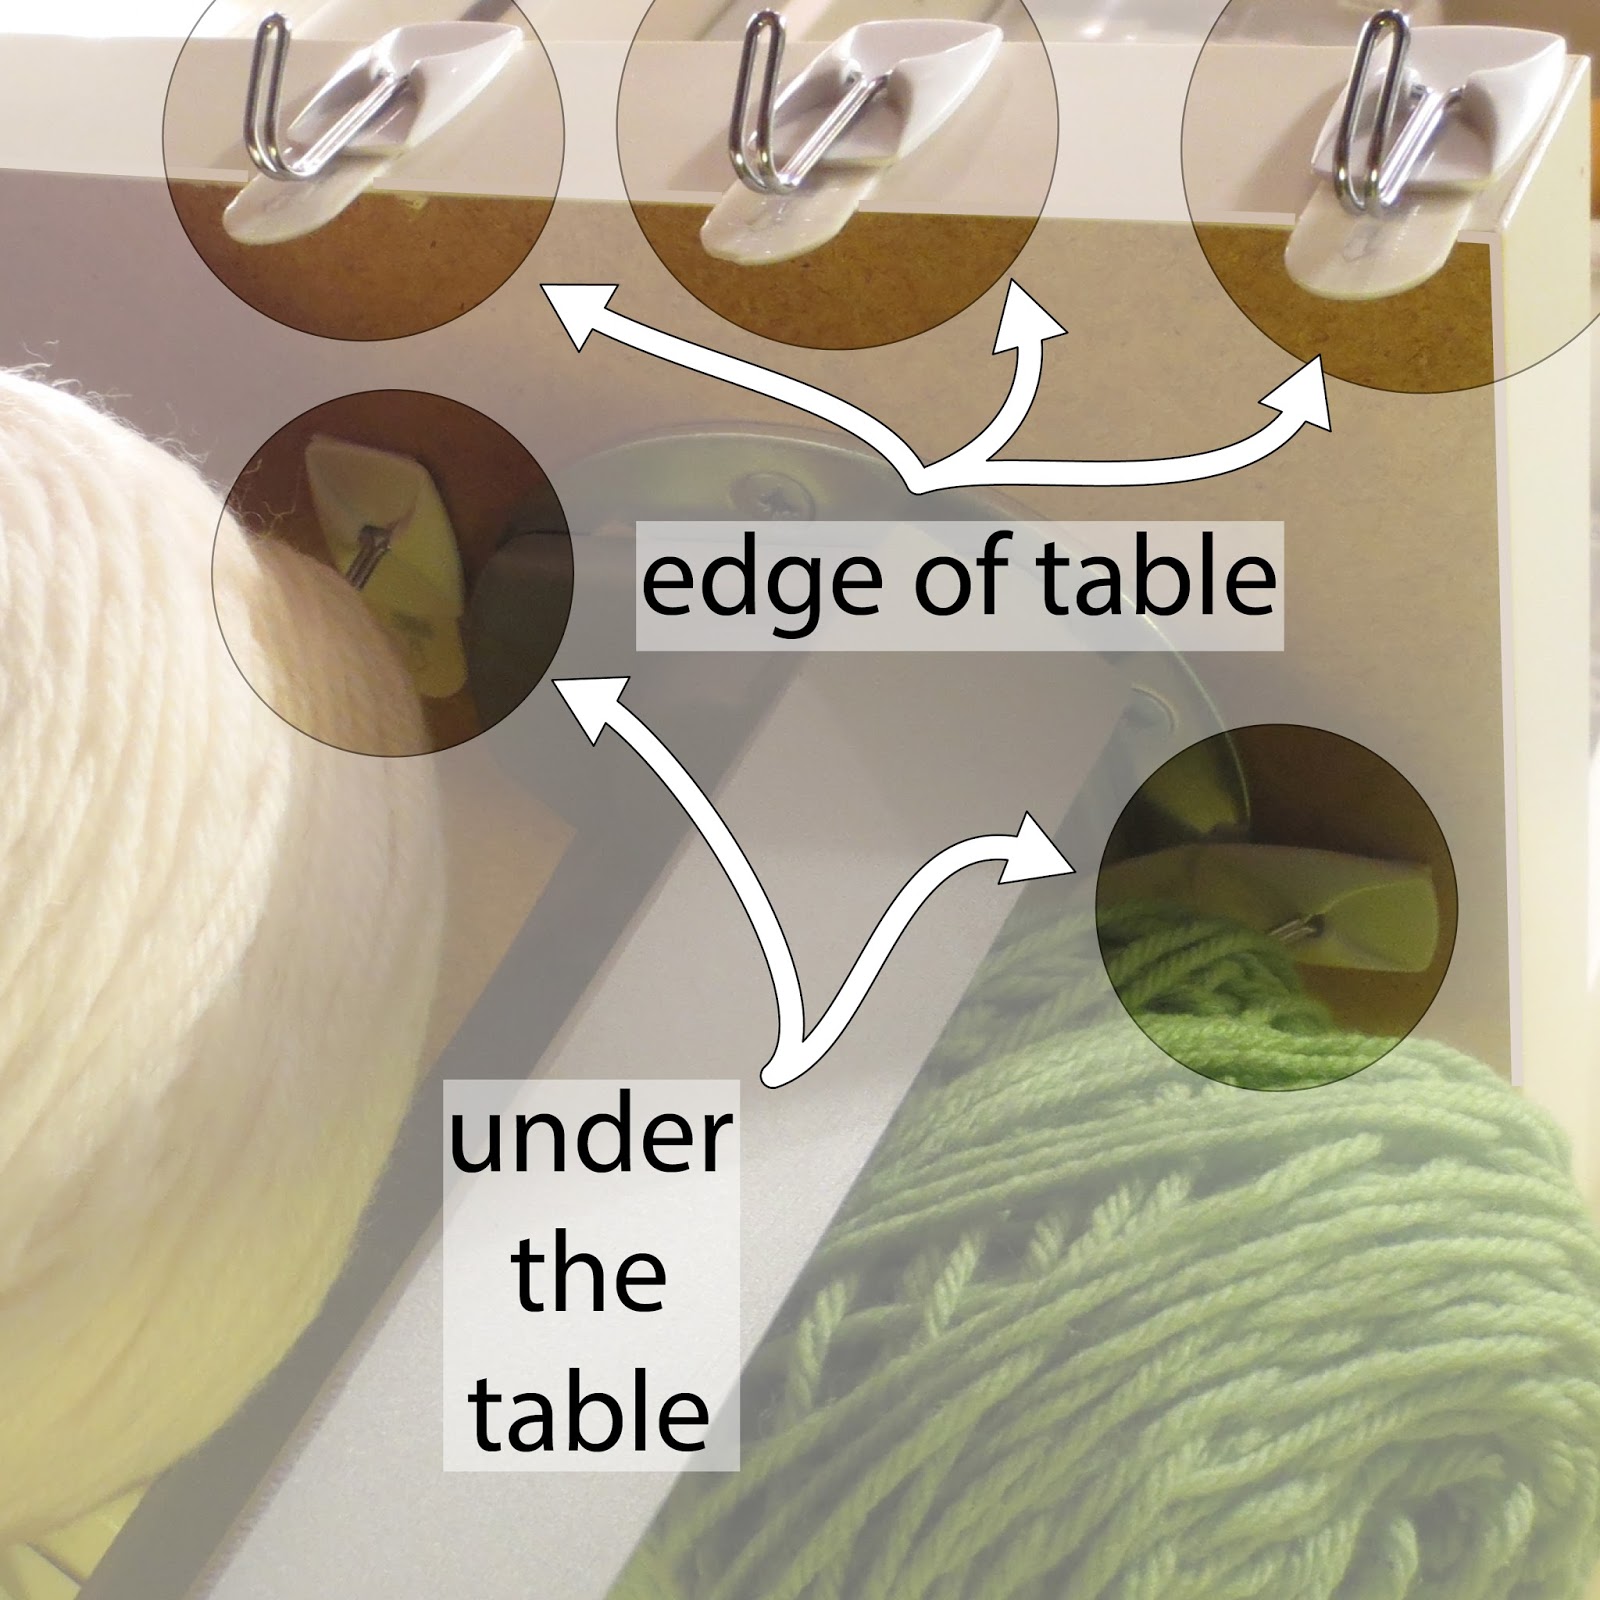 |
| command hooks in action--view from under the table |
I take a pocket full of hooks and strips with me on my travels, too. And you know, you can combine KnitziMitzi's bag-trick with the hook-trick: hang the bags ON the hooks and you really are good to knit in pretty much any situation anywhere.
Pro:
- There is very little tangling with command hooks because the balls remain in one place and the running yarns do not easily cross
- Command hooks up the least room of any system, and they the most adaptable--there is always some surface you can stick these to!
- Easy to rearrange the order of the yarn, easy to add and remove yarns from the lineup
- Adaptable: command hooks go up and take down in minutes but can also be used in a permanent situation, such as the knitting nook work station illustrated above.
- As for storage: you can hang smallish WIP over one or two of the hooks, just make sure you catch either the barrel of a straight needle, or the cable on a pair of circs.
- Initially expensive-ish
- Only works with center pull balls--do not use with yarns which tend to bias
- small hooks are only rated to 1/2 lb.
- (despite this weight limitation, I have, on occassion, hung several balls of yarn from them in a project bag and there has never been a problem. Yet, your experience may differ)
- The package indicates the sticky backer should be allowed to sit for some time with no load before use
- (I always use them right away but, again, your experience may differ )
Do you have any neat ideas for organizing color-knitting yarn to make it easier to knit multiple colors at a time?
--TK


