Invisible stranding in color knitting via ladderbacks has been the topic of several previous TECHknitting posts.
- The first post was an intro to the STUART ladderback method
- Next was an (adorable!) skeleton hat showing STUART in action
- Then, in the post right before this one, I showed a hot water bottle cover featuring a modification: using pinstripes to firmly fasten down the floats of a long ladderback, row-by-row.
Today's post goes beyond STUART. You see, STUART offers two advantages. 1) It's a method for regulating your tension on long floats as you are knitting, and 2) it is also a method for fastening down the long floats after the knitting is done. But, if you are an expert knitter (or just a bold one) you could simply knit super-long floats without any tension-regulation help from STUART, and then tack down your super-long floats afterward, as part of the finishing process.
In short, today's post is useful if you are skilled enough--or bold enough--to simply knit giant long floats without STUART's help in regulating the float tension. The point is, today's post does not talk about how to KNIT those floats--it simply shows you three methods for TACKING DOWN those long floats as part of the finishing process.
In short, today's post is useful if you are skilled enough--or bold enough--to simply knit giant long floats without STUART's help in regulating the float tension. The point is, today's post does not talk about how to KNIT those floats--it simply shows you three methods for TACKING DOWN those long floats as part of the finishing process.
Alternative #1: FREE-FORM PINSTRIPE-TACKING
(column-in-a-column, similar to the quilter's trick of "stitch in the ditch")
In combining pinstriping with STUART, the previous post showed the catchment column re-hooked as a PURL column, and then a pinstripe was worked up this purl column to tack the long float in place, row-by-row. However, It is actually possible to work a "free-form pinstripe" right up the middle of a KNIT column, and use that to catch the floats on every row. In other words, despite the fact that pinstripes are ordinarily worked into a purl column, a purl column is not actually required to work a pinstripe. Instead, you can work a pinstripe in a different way--worked right through an knit column--and tack long floats in that manner.Working a pinstripe through a knit column is called a "free-form pinstripe." A free-form pinstripe is the knitter's analog to the quilter's trick of "stitch in the ditch."
The upside is, if you are bold enough to knit long floats, then free-form pinstripes offer a way of permanently tacking these down after the fact. However, the downside is, free-form pinstriping makes a "column-in-a-column" which is visible on the fabric surface.
Here is a diagram of what is going on.
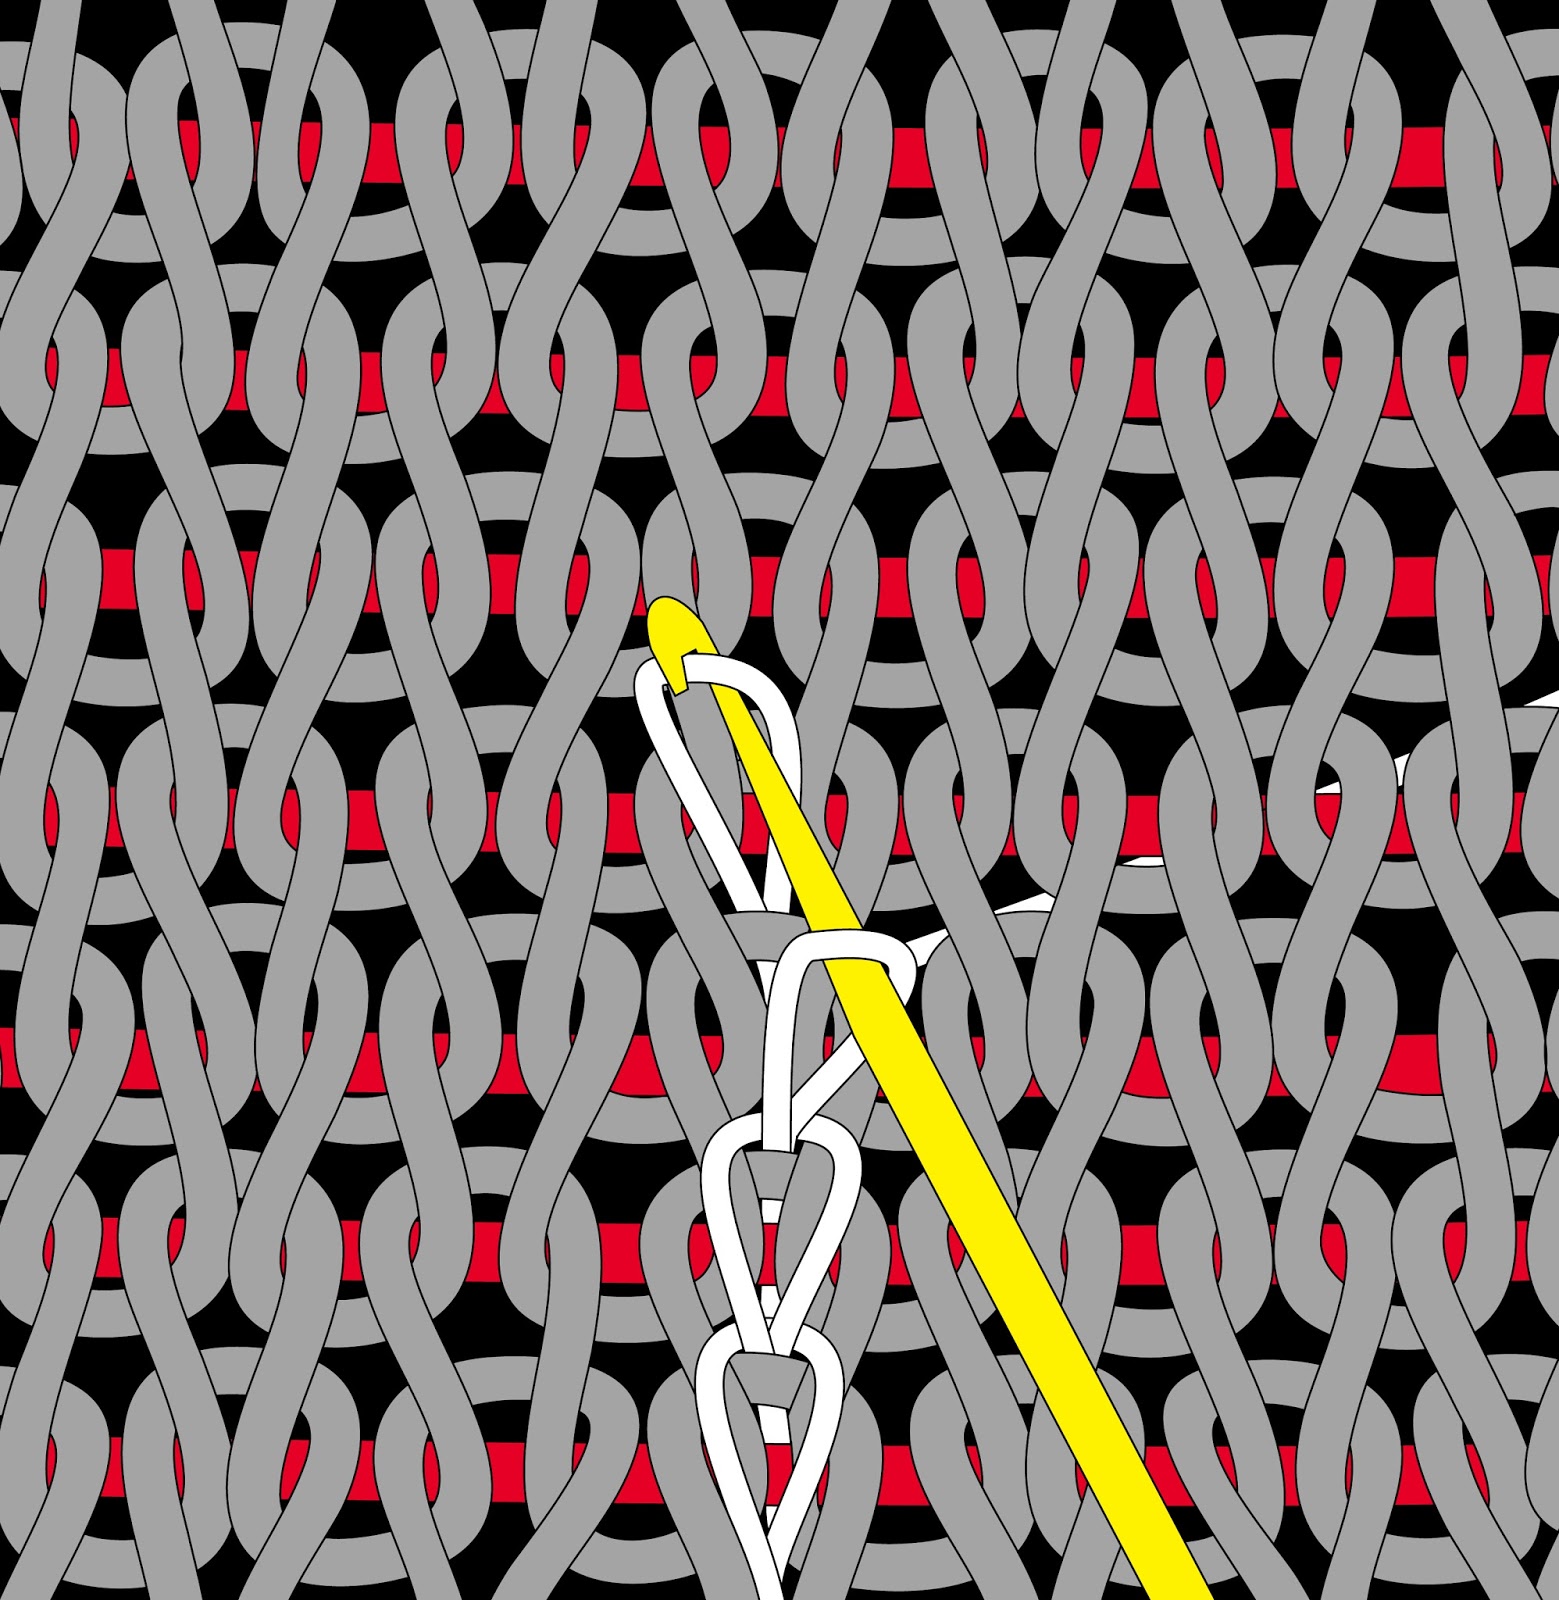 |
| free-form pinstriping in action |
Here's a close-up of what's going on:
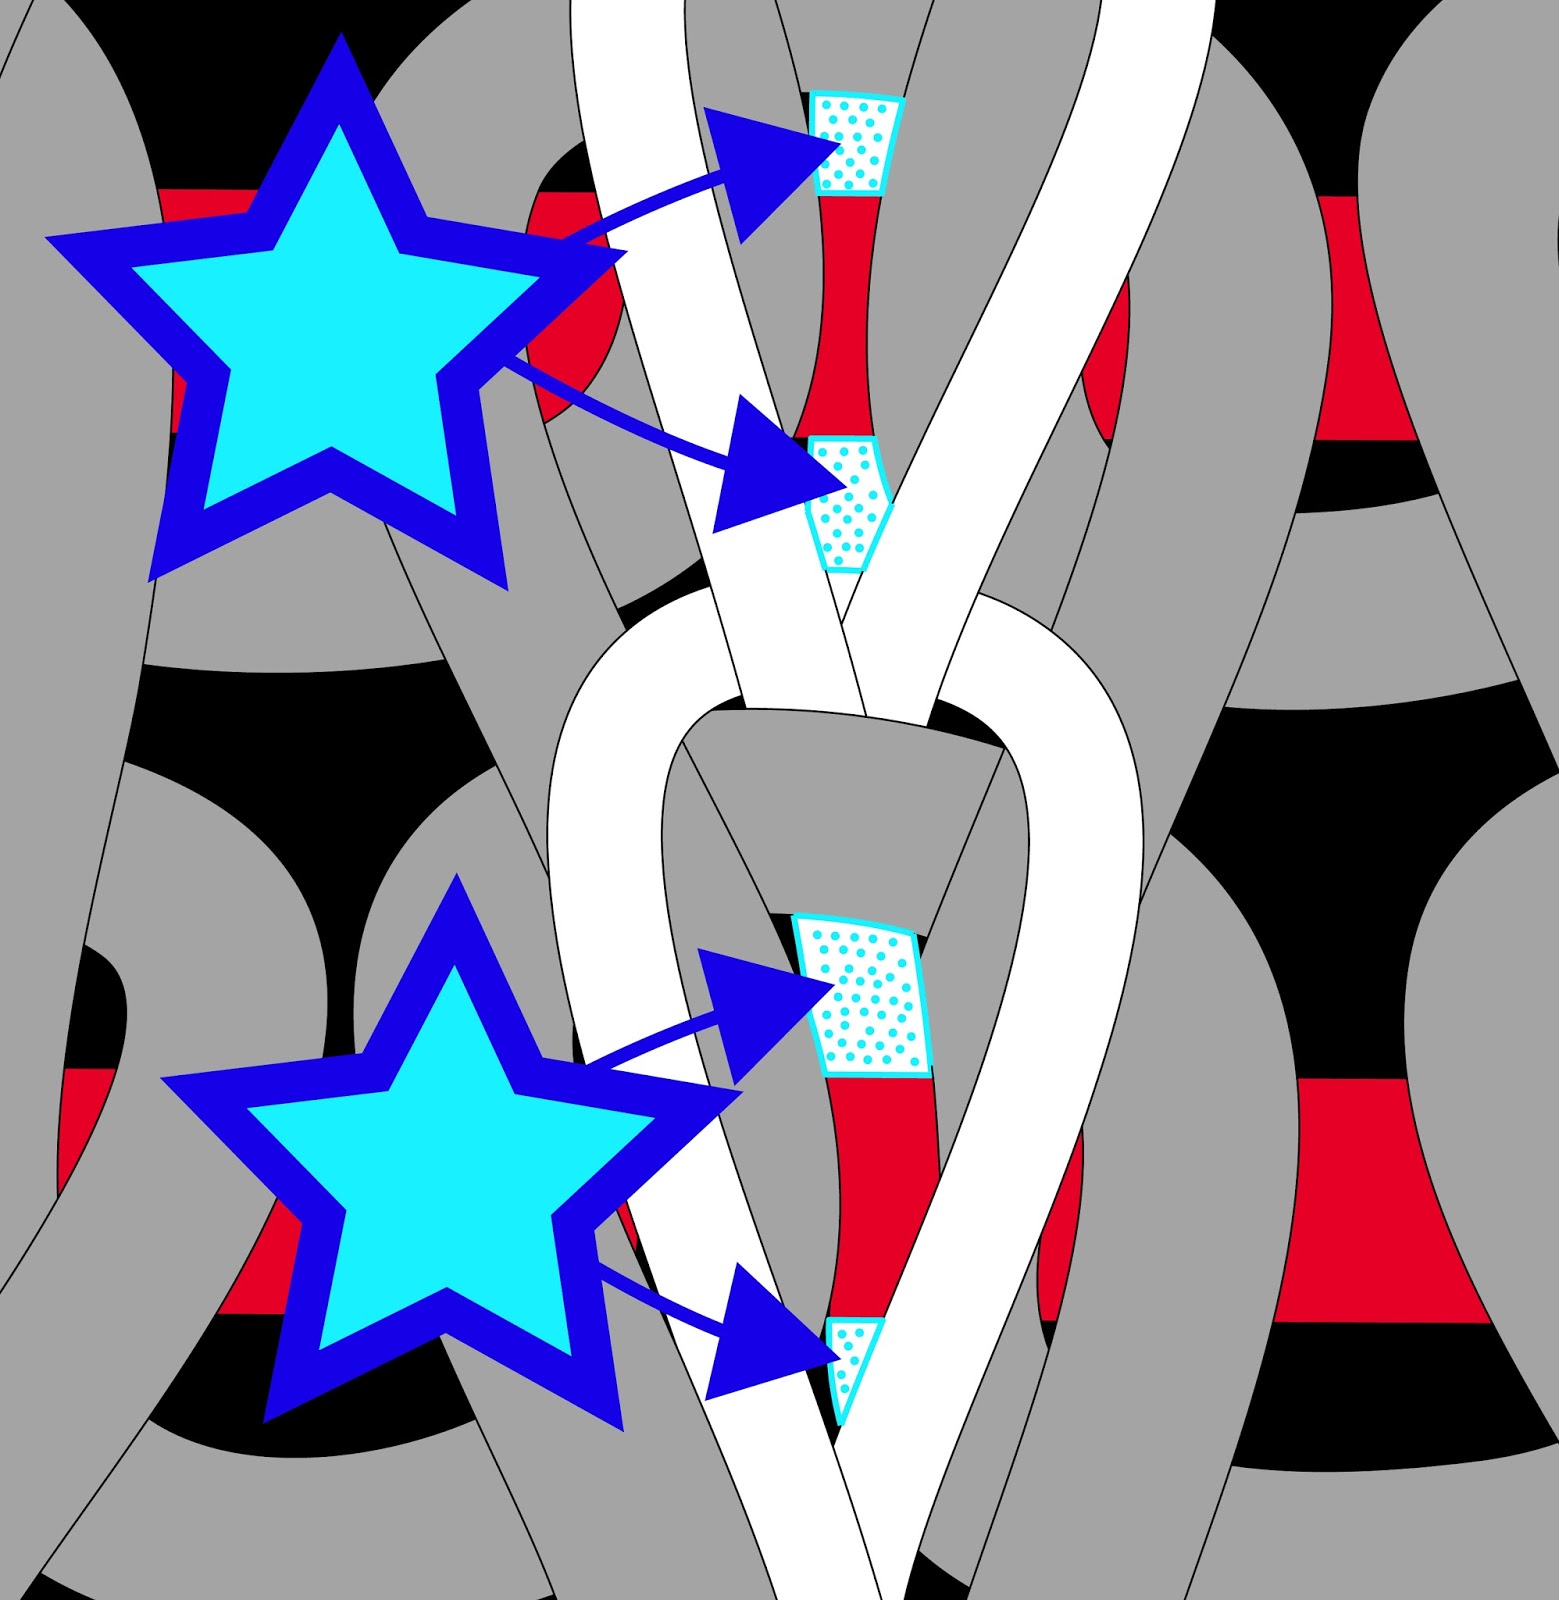 |
| close-up of free-form pinstripes |
The blue stars point at the blue-dotted stretches: these are the running yarn behind the slip stitches. It is these running yarns which hold the floats (red) against the back surface of the fabric. Naturally, the slip stitches and the background stitches would be the same color in real life (as shown on the photo below). I just drew the slip stitches white and the background stitches gray so you could see what is going on.
Below is a photo of this process in real life.
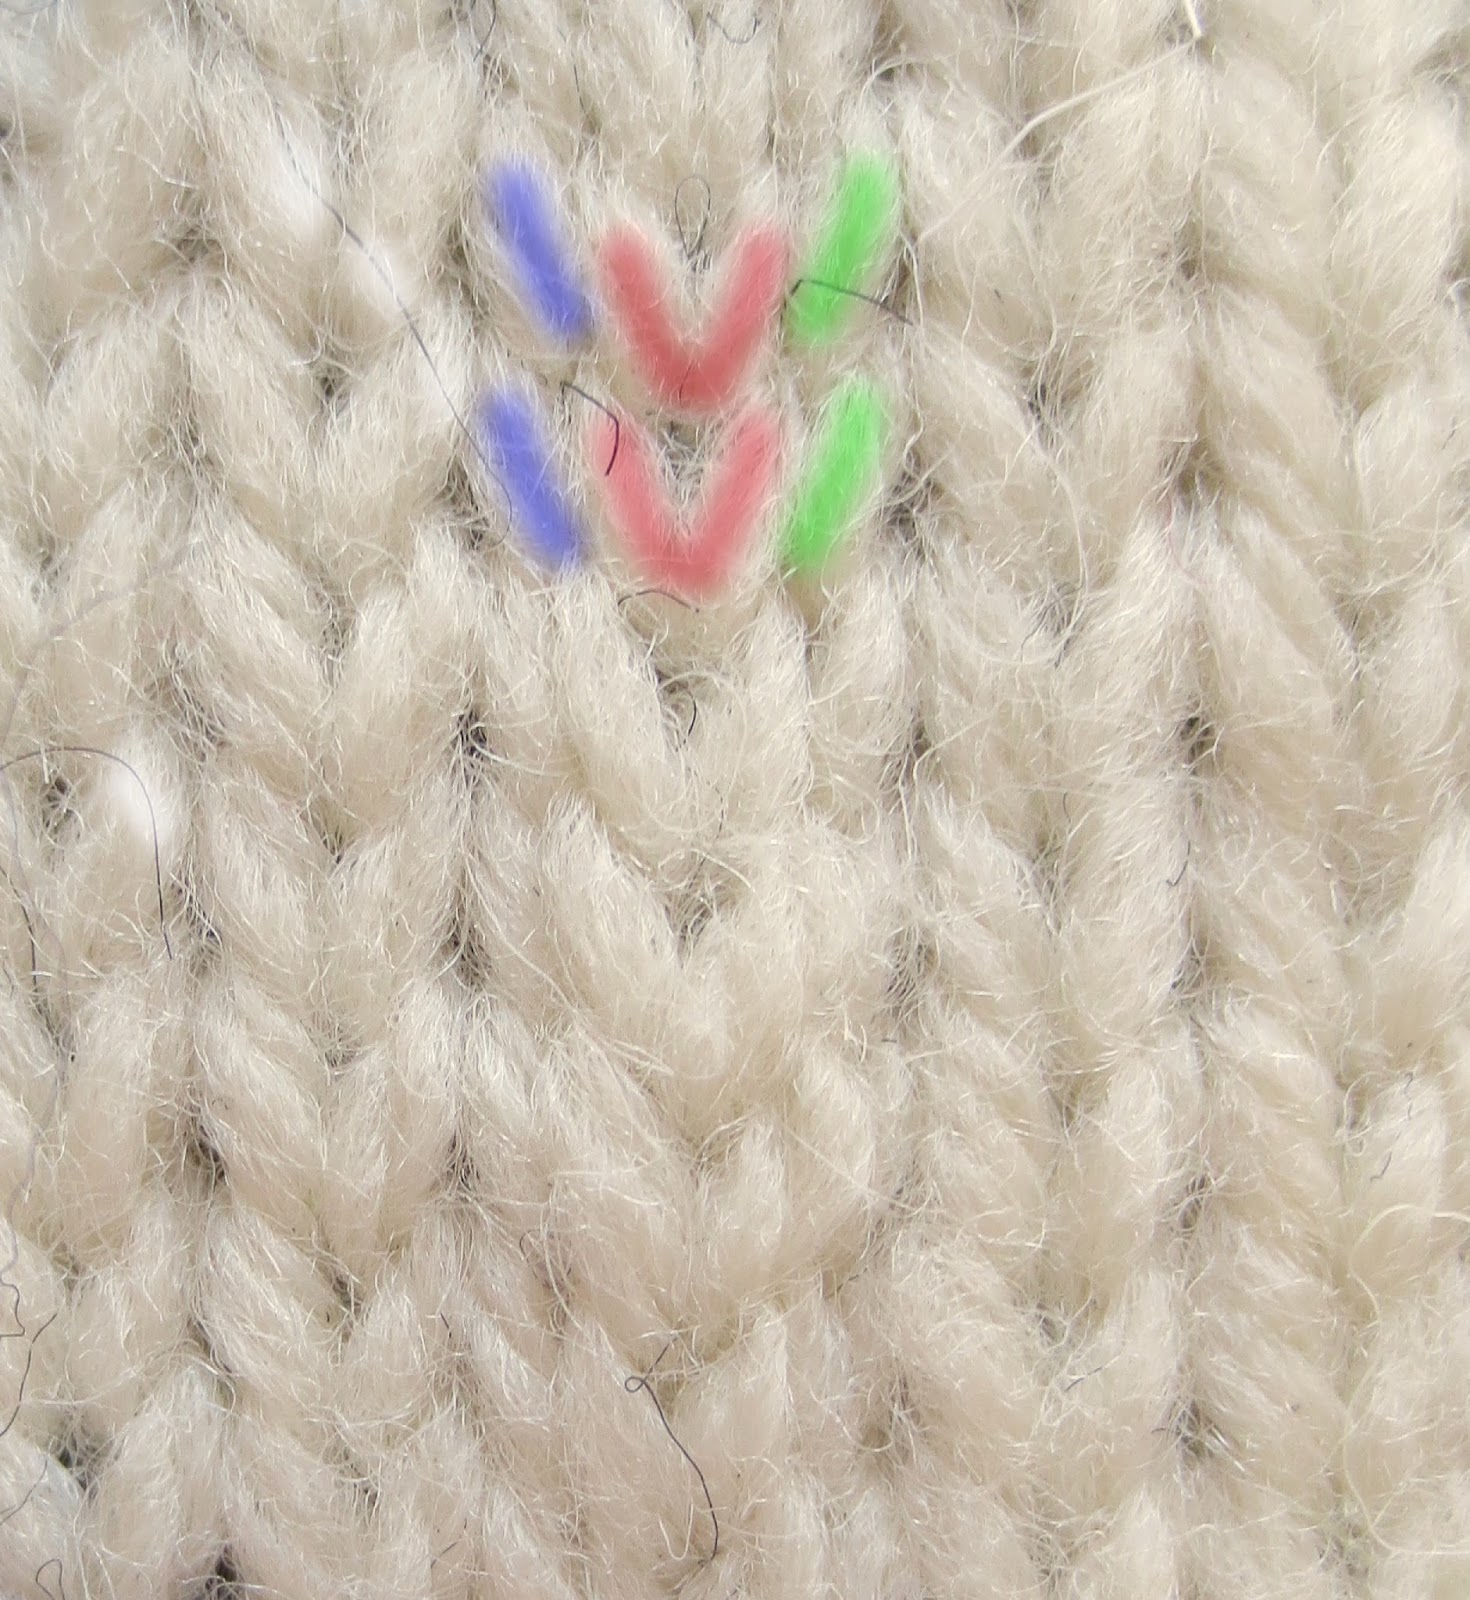 |
| Column-in-a-column free-form pinstriping, in real life. The blue colorization highlights the left arms of the original stitch, the green highlights the right arms and the red highlights the free-form pinstripe |
You can see the white free-form pinstripe forming a column-in-a-column on the fabric surface. In other words, the original knit column is split in half by the pinstripe. The result is that the left arm of the original column (colorized blue) frames the centered free-form pinstripe (colorized red) while the right arm of the original column (colorized green) frames the right side of the free-form pinstripe. I only colorized two rows for you. The bottom part of the photo shows the free-form pinstripe in its un-colorized state, and you can see this is fairly subtle, even on this extreme closeup.
Here's what this looks like on the back. The white free-form pinstripe tacks the long floats (black) to the back surface of the fabric on every row.
 |
| The white column-in-a-column free-form pinstripe, as seen from the back, used to tack down long black floats |
Are you concerned that this column-in-a-column free-form pinstripe will show or be bulky? I'm not going to lie, the answer is YES--you can both see and feel the free-form pinstripe. In fact, if you use this trick, then as the knitter who made the thing, you will never be able UN-see it!
However, this does not mean others will see it. See, you have to convince yourself, just like magicians do, that despite how obvious this trick is to you, it is invisible to others.
"Magic tricks" work because under normal conditions, we humans only SEE what we are LOOKING for. This trick doesn't disturb the fabric so much that it draws attention to itself: only two out of 10 knitters in a class I taught noticed the column-in-a-column appearance of the free-form pinstripe, despite being allowed to handle the original sample and look at the outside, and despite knowing that something was up with the fabric. Naturally, once they could look at the inside, and once the matter was brought to their attention, it was head-slappingly obvious. However, if eight out of ten knitters did not notice until it was pointed out, I believe you may rest easy.
Naturally, the thicker the original yarn, the less likely this trick is to escape unnoticed, but the photographed sample was knit in worsted weight, the freeform pinstripe-tacking was worked in that same weight and the whole business still slipped unnoticed by some fairly knowledgeable folks.
Super geek note #1: POLYESTER SEWING THREAD:
If you slip stitch using polyester sewing thread instead of yarn, the result is invisible, utterly and truly.
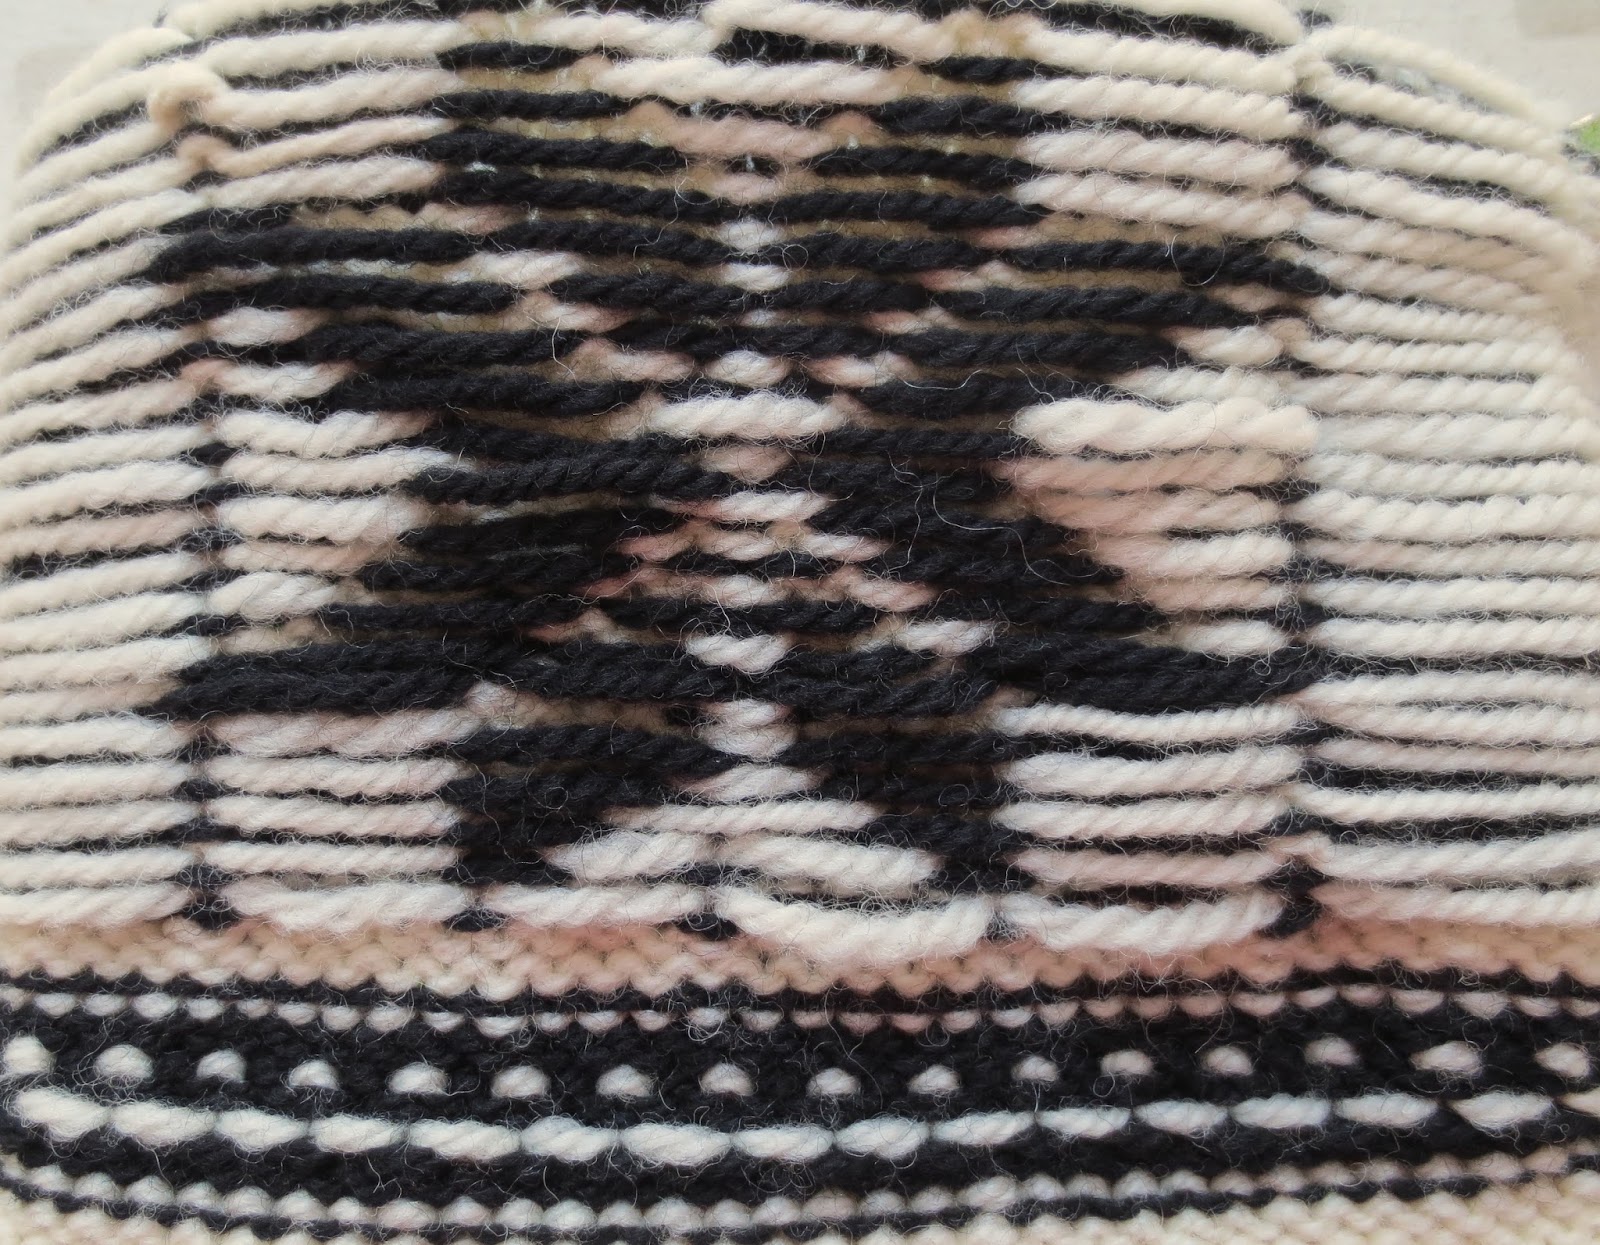
 |
| Ordinary black polyester sewing thread used instead of yarn to work a free-form pinstripe where the surface fabric is black (in other words, what is being caught here is long white floats behind a black background). The thread is invisible on the front--which is why the only photo is of the back! |
There are a few reasons slip-stitching with polyester thread is not my first choice. First, tension is more of an issue with thread than with yarn. Second, sewing thread is so strong that, over time, it has the potential to cut the yarn fibers, especially on cashmere, merino or other soft fibers. But the main problem is that sewing thread is slippery and hard to slip-stitch with. It's frustrating to lose the thread-loop and have to start all over again (and again, and again!). Although you can (somewhat) mitigate the losing-the-loop problem by working with a small latch hook, like a knit picker, the tension problems really arise from trying to control the loop in the first place. In other words, as truly invisible as this is, it's waaay pickier than working with yarn--and working with yarn is plenty picky already.
But, again, balance against all these disadvantages, the fact that slip stitching long floats in place with sewing thread is utterly invisible (which column-in-a-column yarn freeform pinstripes are not). As always, it's knitter's choice.
Super geek note #2: The photos and diagrams above show the float running free, then tacked down via a free-form pinstripe. However, if you find that your floats are a bit loose, you could ladderback the floats and THEN tack them down. In other words, you don't have to STUART-ized your long floats (slip and park, the release them) to afterward form a ladderback, you can actually simply ladderback ANY long floats which have enough slack in them (the trick, however, is to knit looooong floats at a perfect tension--which is quite a trick!)
Super geek note #3: You could try running the free-form pinstripe tacking BETWEEN the columns, but I think this is more obvious--it appears as an extra column inserted into the fabric, as you see from the below photo. But hey--try it and see what YOU think.
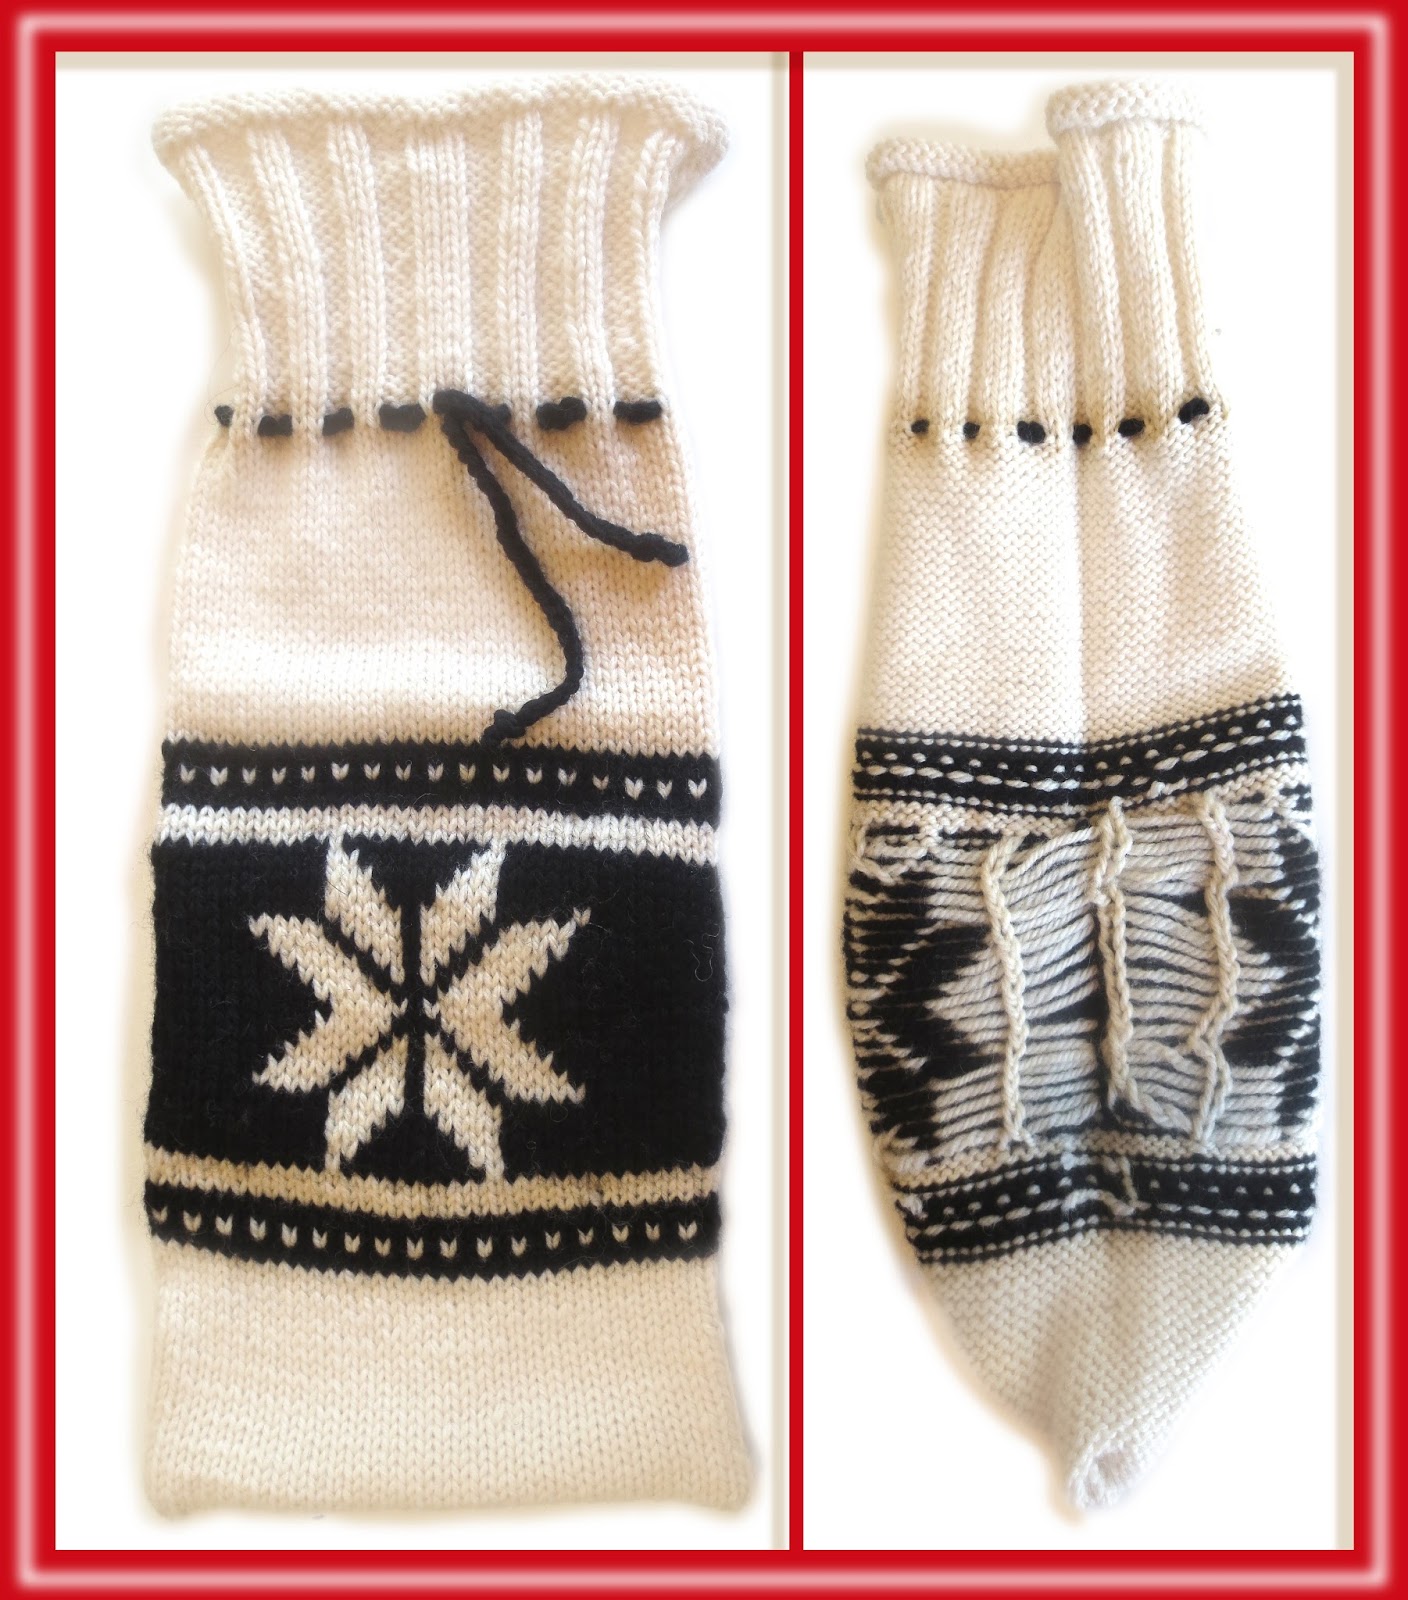
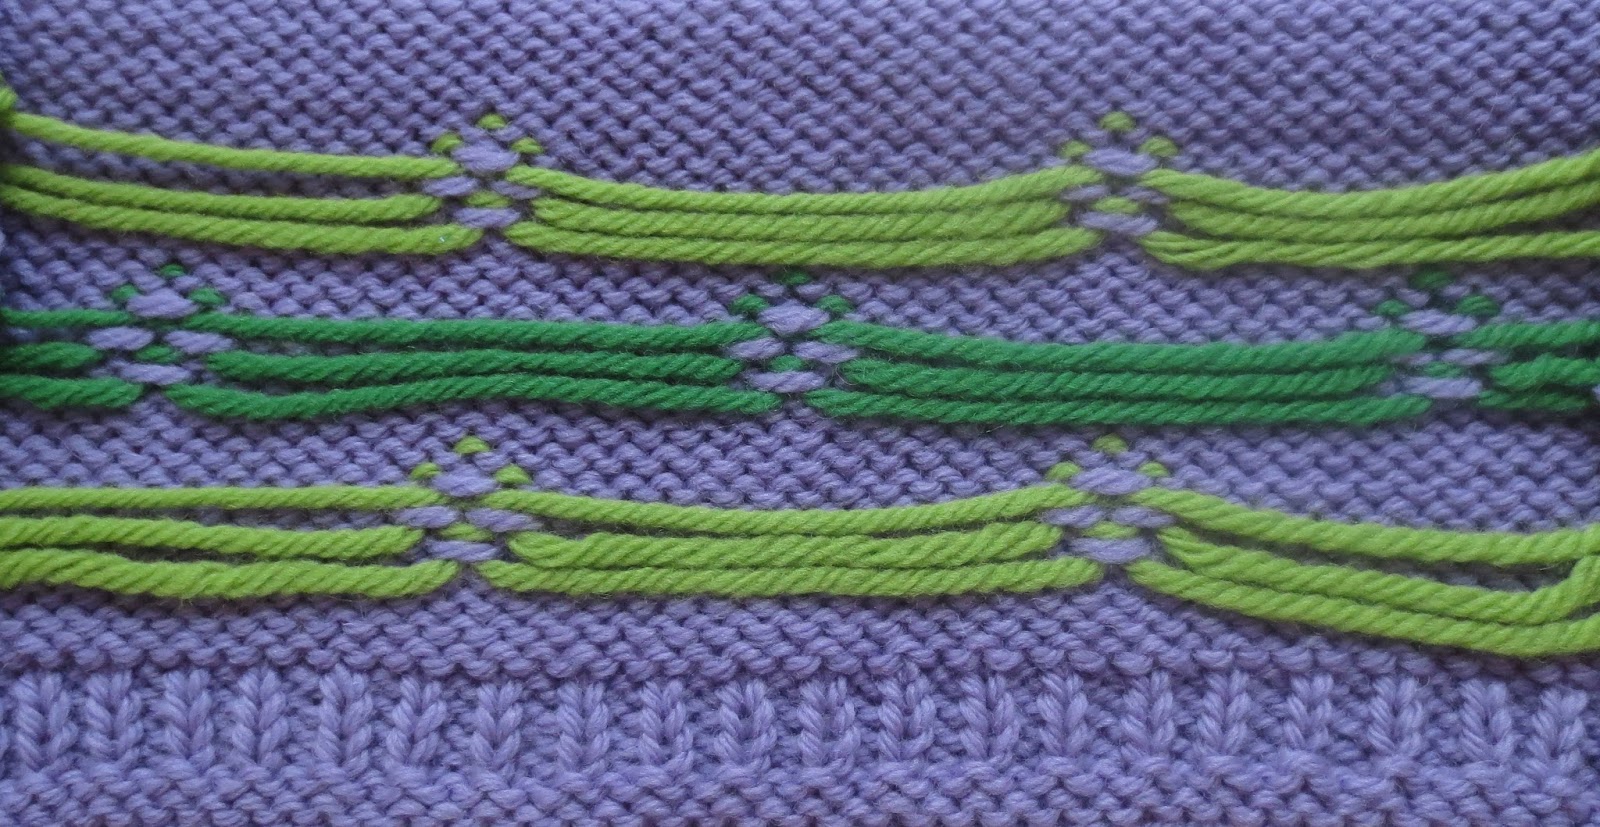
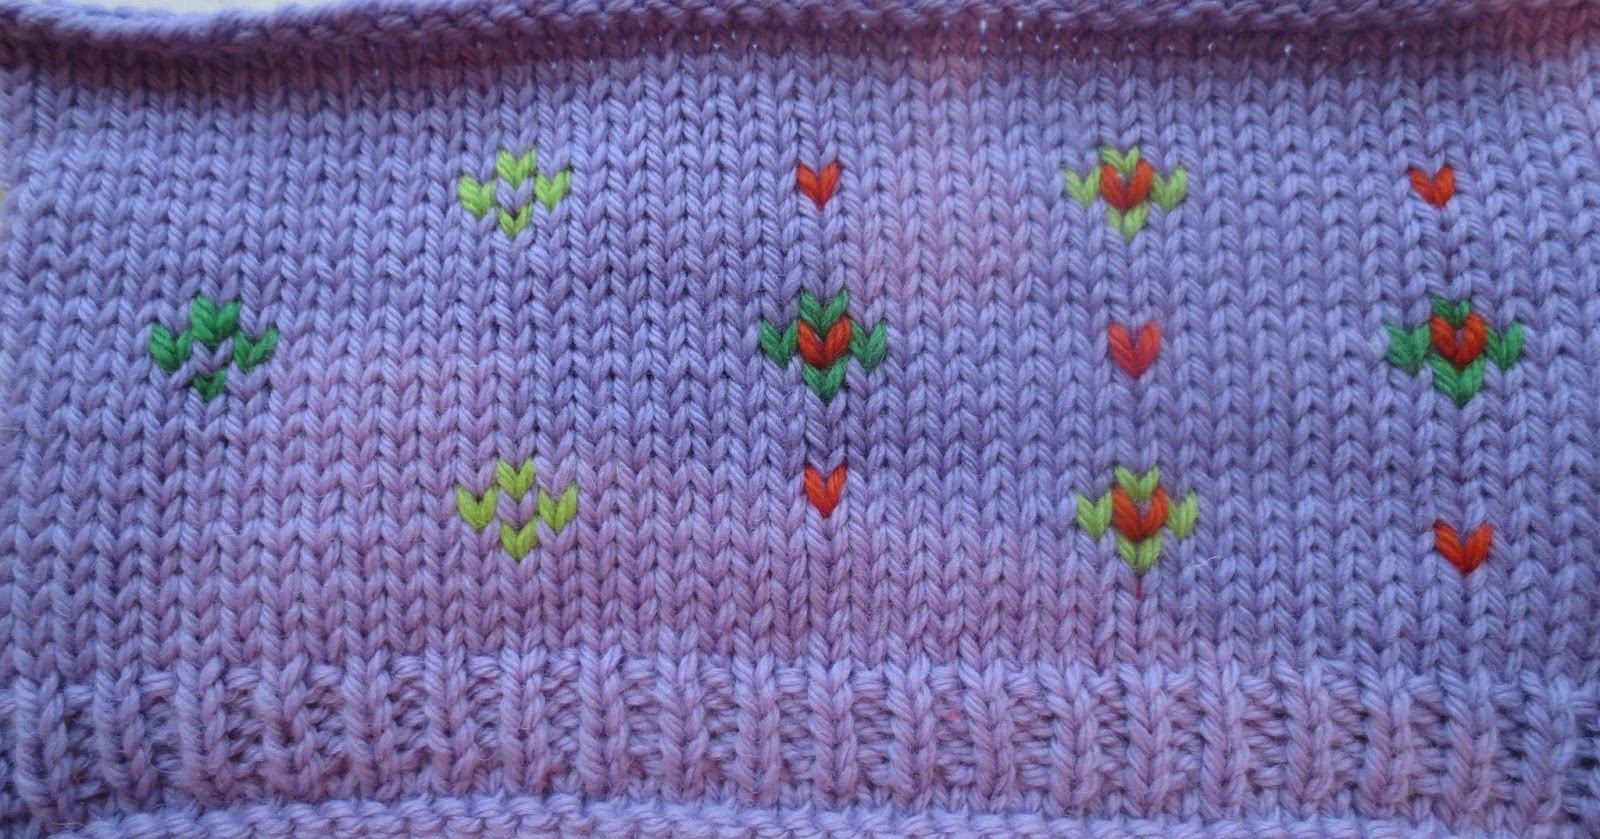
And think how neat it would be if you actually used the duplicate stitch to not only tack the floats, but as a pretty little highlight-stitch in a completely different color--a dot along a Fair-Isle row, for example, thus killing two birds with one stone. Here's a little sample I knitted for you which merely hints at the possibilities.
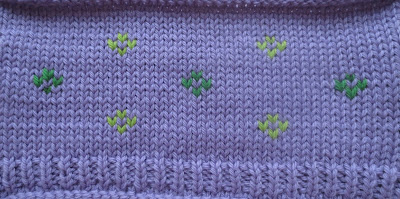
Below are two photos which show the front and back of the sample after knitting, but before tying the long floats down with a duplicate stitch.

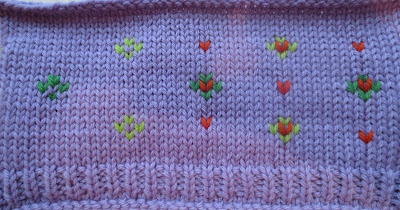
Below are two photos which show the front and back during the duplicate stitch process.

The obvious downside to duplicate stitching is that you have more ends to work in. In the above sample, I skimmed the yarn from one far-spaced duplicate stitch to the next, exactly for the purpose of reducing the number of ends to work in. Which leads me to final trick...
--TK
You have been reading TECHknitting blog on invisible stranding in knitting, part 4: alternatives to STUART--tacking down super-long floats as part of the finishing process.
Super geek note #2: The photos and diagrams above show the float running free, then tacked down via a free-form pinstripe. However, if you find that your floats are a bit loose, you could ladderback the floats and THEN tack them down. In other words, you don't have to STUART-ized your long floats (slip and park, the release them) to afterward form a ladderback, you can actually simply ladderback ANY long floats which have enough slack in them (the trick, however, is to knit looooong floats at a perfect tension--which is quite a trick!)
Super geek note #3: You could try running the free-form pinstripe tacking BETWEEN the columns, but I think this is more obvious--it appears as an extra column inserted into the fabric, as you see from the below photo. But hey--try it and see what YOU think.
 |
| ...appears as an extra column inserted into the fabric... |
Alternative #2 DUPLICATE STITCH
Rather than run a continuous column of free-form pinstripes, you could instead use duplicate stitches to tack the floats, either a) every-row, or b) in bunches. If you do this trick, then, like all duplicate stitching, be sure to duplicate stitch with a dull-pointed needle so you don't pierce the floats or the fabric stitches on the outside, but actually work over the fabric-surface stitches, as well as the floats.
a) Every row
If you work a duplicate stitch every row to fasten down the floats, ask yourself why you aren't freeform pinstripe-tacking instead? Pinstripe-tacking is worked with a running yarn (faster) while sewing (which is what duplicate stitch actually is) is worked with a cut-length (slower). However, perhaps you prefer sewing duplicate stitch to slip-stitching a column with a crochet hook? If so, carry on...
b) Bunches
If you gather the floats into bunches on the back, you'd only have to duplicate stitch every few rows. This works best if you only have a very few rows of floats to gather up (two floats? three?)And think how neat it would be if you actually used the duplicate stitch to not only tack the floats, but as a pretty little highlight-stitch in a completely different color--a dot along a Fair-Isle row, for example, thus killing two birds with one stone. Here's a little sample I knitted for you which merely hints at the possibilities.
Below are two photos which show the front and back of the sample after knitting, but before tying the long floats down with a duplicate stitch.
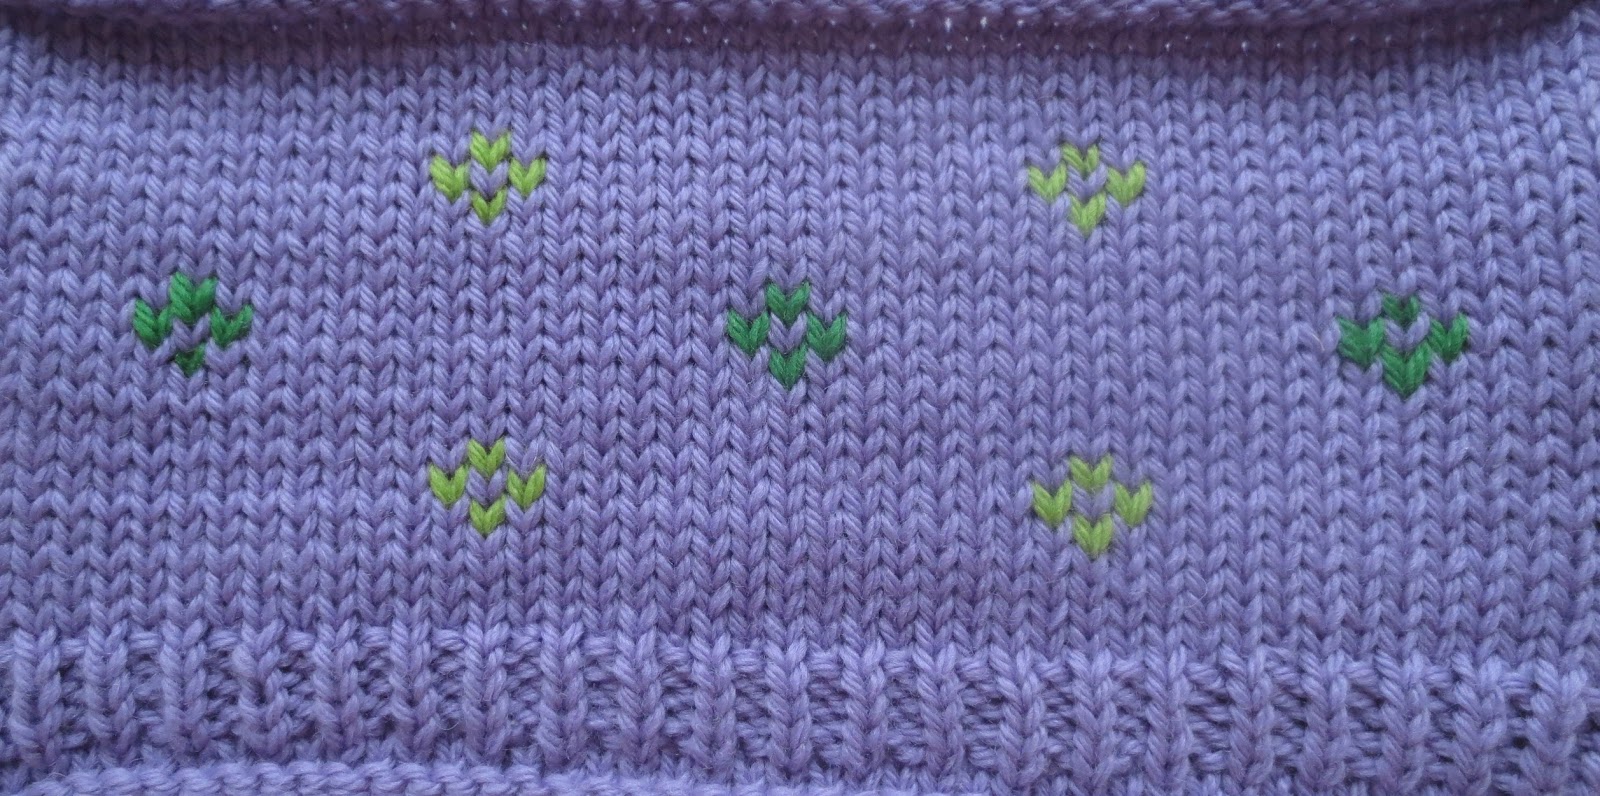
Below are two photos which show the front and back during the duplicate stitch process.

The obvious downside to duplicate stitching is that you have more ends to work in. In the above sample, I skimmed the yarn from one far-spaced duplicate stitch to the next, exactly for the purpose of reducing the number of ends to work in. Which leads me to final trick...
Alternative #3: SKIMMING
You could, you know, simply skim down your super-long floats without the duplicate-stitch trick. For skimming, you thread a sharp sewing needle with a sock yarn in a matching color, then skim though the floats and the fabric back. This is just like skimming in ends. It doesn't look that great on the back (but it doesn't look worse than the duplicate stitch, either). In short, skimming in ends is a straightforward way of fastening down super long floats invisibly: much better than leaving super-long floats on the fabric back.--TK